📋 Overview
OneComme OSC Router is a powerful plugin that transforms chat messages from YouTube, Bilibili, and Niconico into OSC (Open Sound Control) data streams. This guide will walk you through every step of setup and usage.
Make sure you have:
- OneComme installed and configured with your streaming platform accounts
- An OSC-enabled application (VRChat, OBS, TouchDesigner, etc.)
- Basic familiarity with OneComme's interface
What You'll Learn
- How to install and configure the plugin
- Navigating the web-based control panel
- Creating custom message routing rules
- Integrating with VRChat and other applications
- Troubleshooting common issues
📦 Installation
Visit the GitHub Releases page and download the latest version (v0.8.0 or newer).
Extract the downloaded ZIP file to your OneComme plugins directory. The folder structure should look like this:
OneComme/
└── Plugins/
    └── onecommeOSCrouter/
        ├── plugin.js
        ├── package.json
        ├── web-ui/
        ├── impl/
        ├── tests/
        └── node_modules/
Screenshot: File Explorer showing plugin folder in OneComme Plugins directory
Add screenshot: plugin_folder_structure.png
onecommeOSCrouter (case-sensitive). OneComme will not detect it with a different name.
Close and restart OneComme completely to detect the new plugin. A simple refresh won't work—you need a full restart.
- Close OneComme (File → Exit or Alt+F4)
- Relaunch OneComme
- Check the console for plugin load messages
Screenshot: OneComme console showing successful plugin load message
Manual capture needed: console_plugin_loaded.png
Navigate to OneComme's plugin settings and enable "OneComme OSC Router":
- Open OneComme Settings
- Go to the Plugins tab
- Find OneComme OSC Router in the list
- Check the enable checkbox
- Click Apply/Save
Screenshot: OneComme plugin settings with OSC Router enabled
Add screenshot: enable_plugin.png
🚀 First Launch
Once the plugin is enabled, open your web browser and navigate to:
http://localhost:19101You should see the OneComme OSC Router control panel.

http://localhost:19101 as a bookmark for easy access. The interface is accessible anytime OneComme is running with the plugin enabled.
The plugin comes with sensible defaults optimized for VRChat:
| Setting | Default Value | Description |
|---|---|---|
| OSC Host | 127.0.0.1 |
Local machine (same computer) |
| OSC Port | 19100 |
Standard VRChat OSC port |
| Web UI Port | 19101 |
Control panel access |
| Message Format | Binary | Standard OSC format |
Click on the Settings tab to review and modify these if needed.
🖥️ Web Interface Tour
The web interface has four main tabs. Let's explore each one:
📊 Overview Tab
Your dashboard for real-time monitoring:
- Message Statistics: Total messages processed, messages per platform
- Connection Status: OneComme and OSC connection indicators
- System Health: Plugin uptime and performance metrics
- Quick Actions: Fast access to common settings
Screenshot: Overview tab with statistics and connection status
Add screenshot: overview_tab_detailed.png
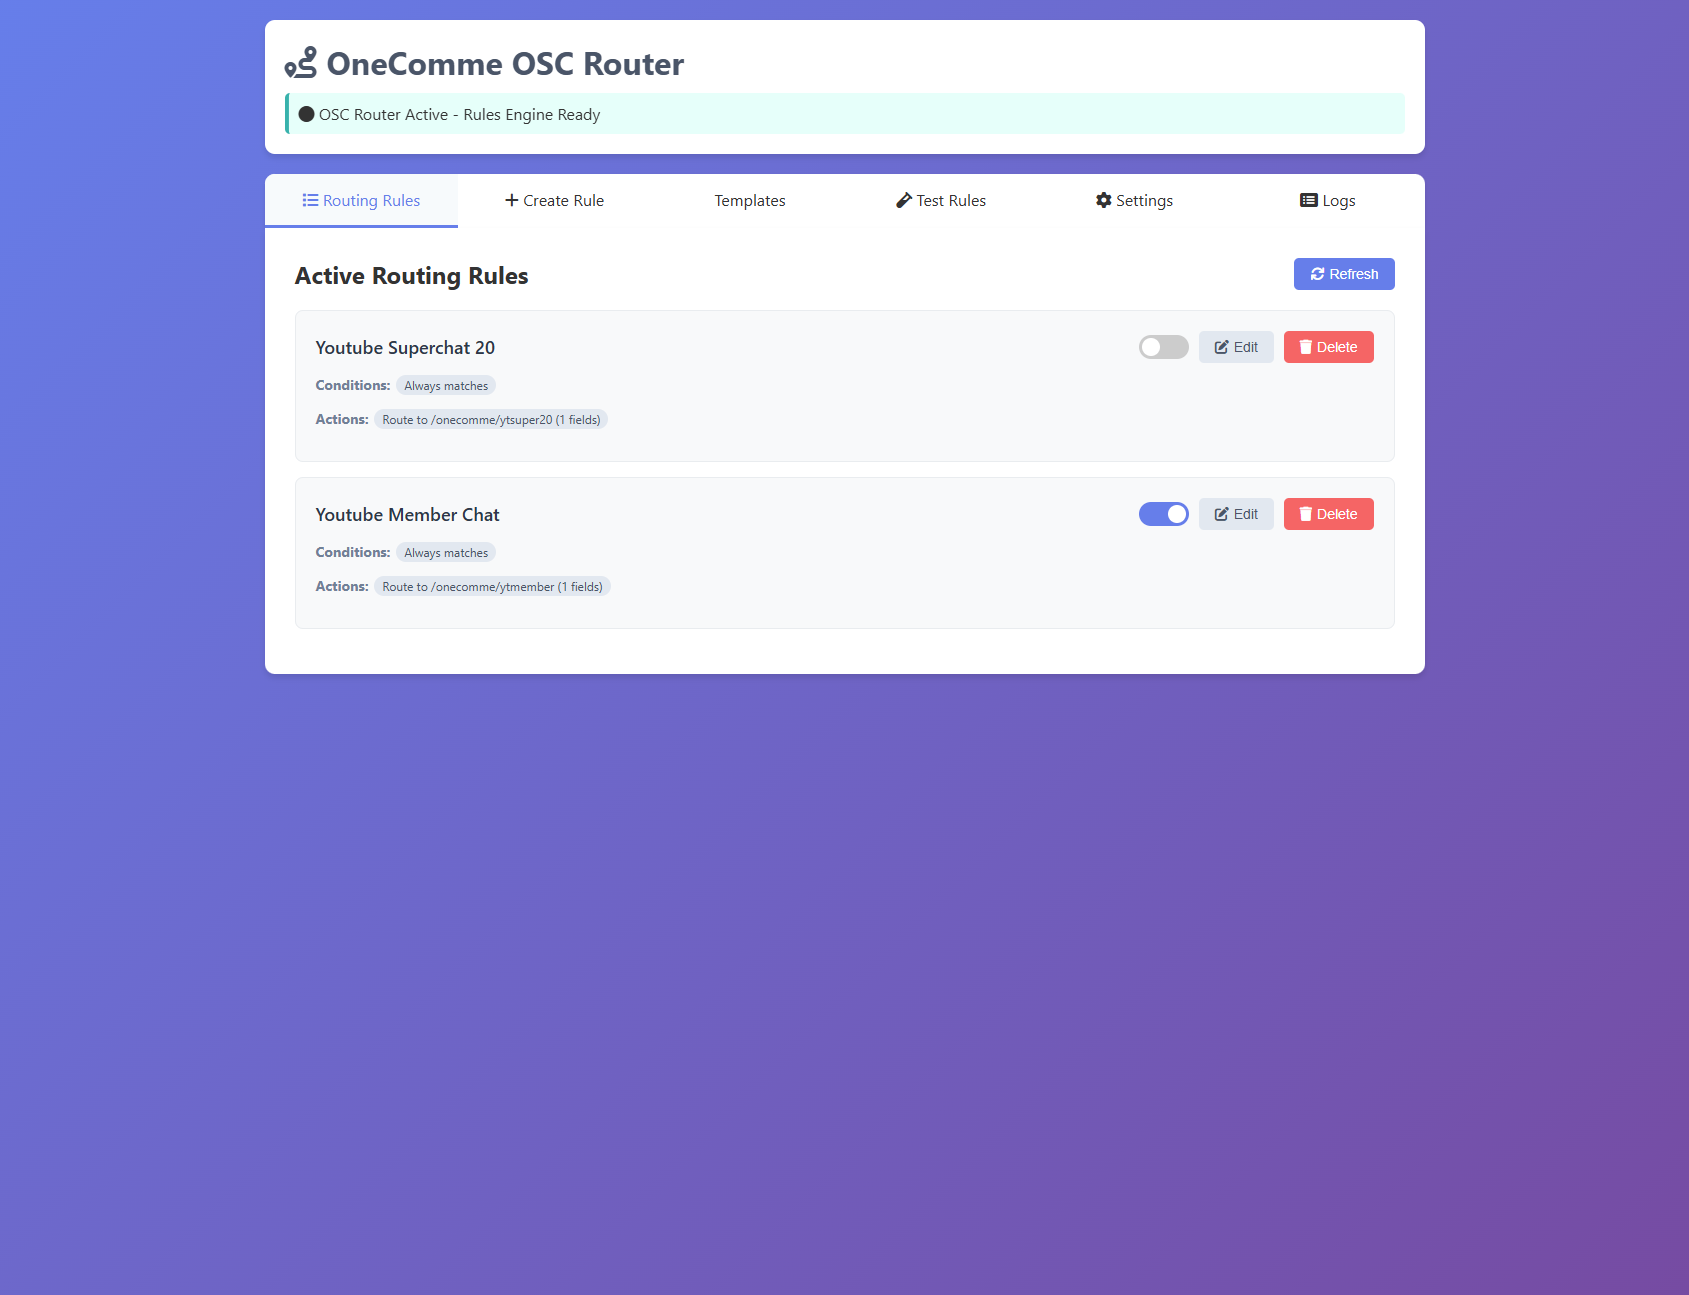
📜 Rules Tab
Create and manage message routing rules:
- Rule List: All your custom routing rules
- Enable/Disable Toggle: Quick rule activation
- Edit Button: Modify existing rules
- Delete Button: Remove unwanted rules
- Add New Rule: Create custom routing logic
- Test Rule: Validate rules with sample messages
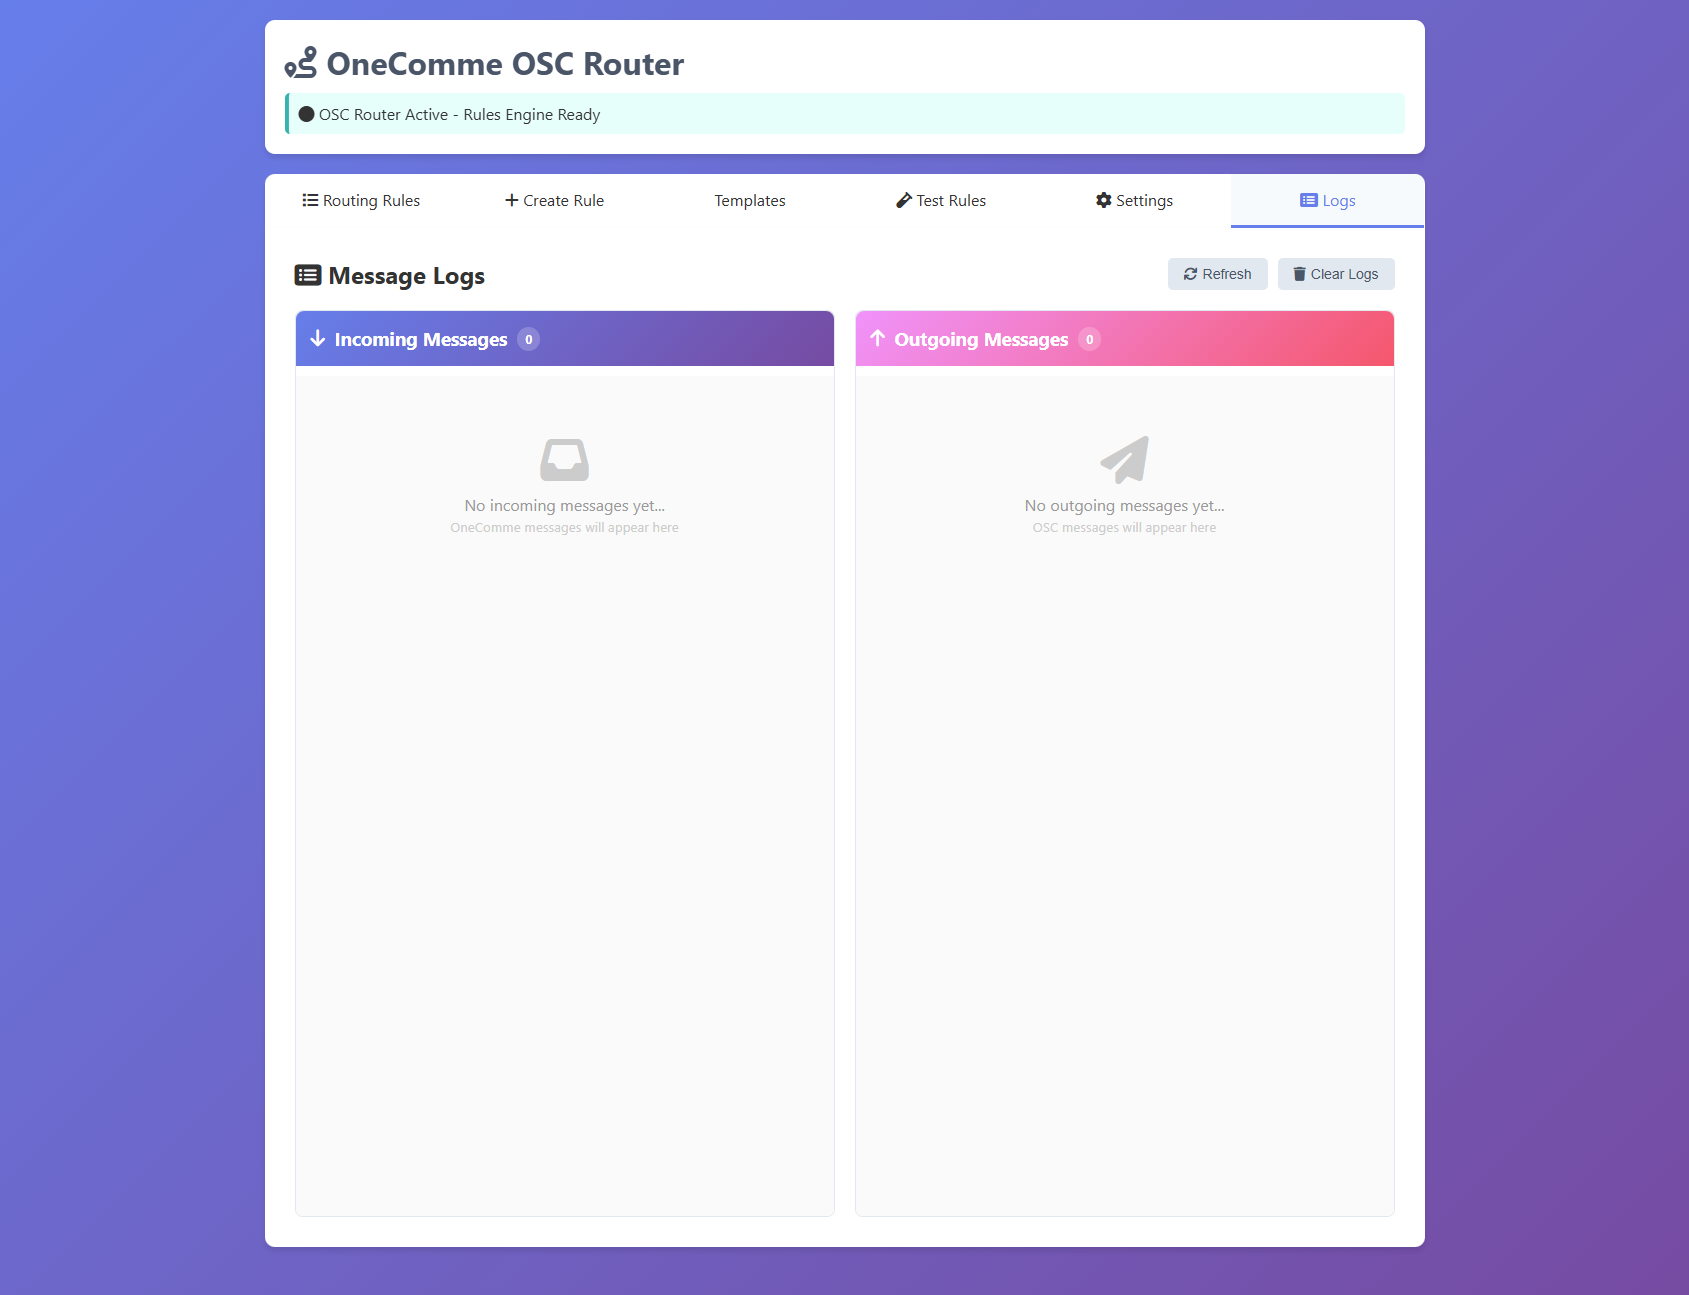
📋 Logs Tab
Monitor message flow in real-time:
- Live Feed: Incoming and outgoing messages
- Filter Options: Filter by platform, message type
- Search: Find specific messages or users
- Export: Download logs for debugging
- Clear: Reset log history
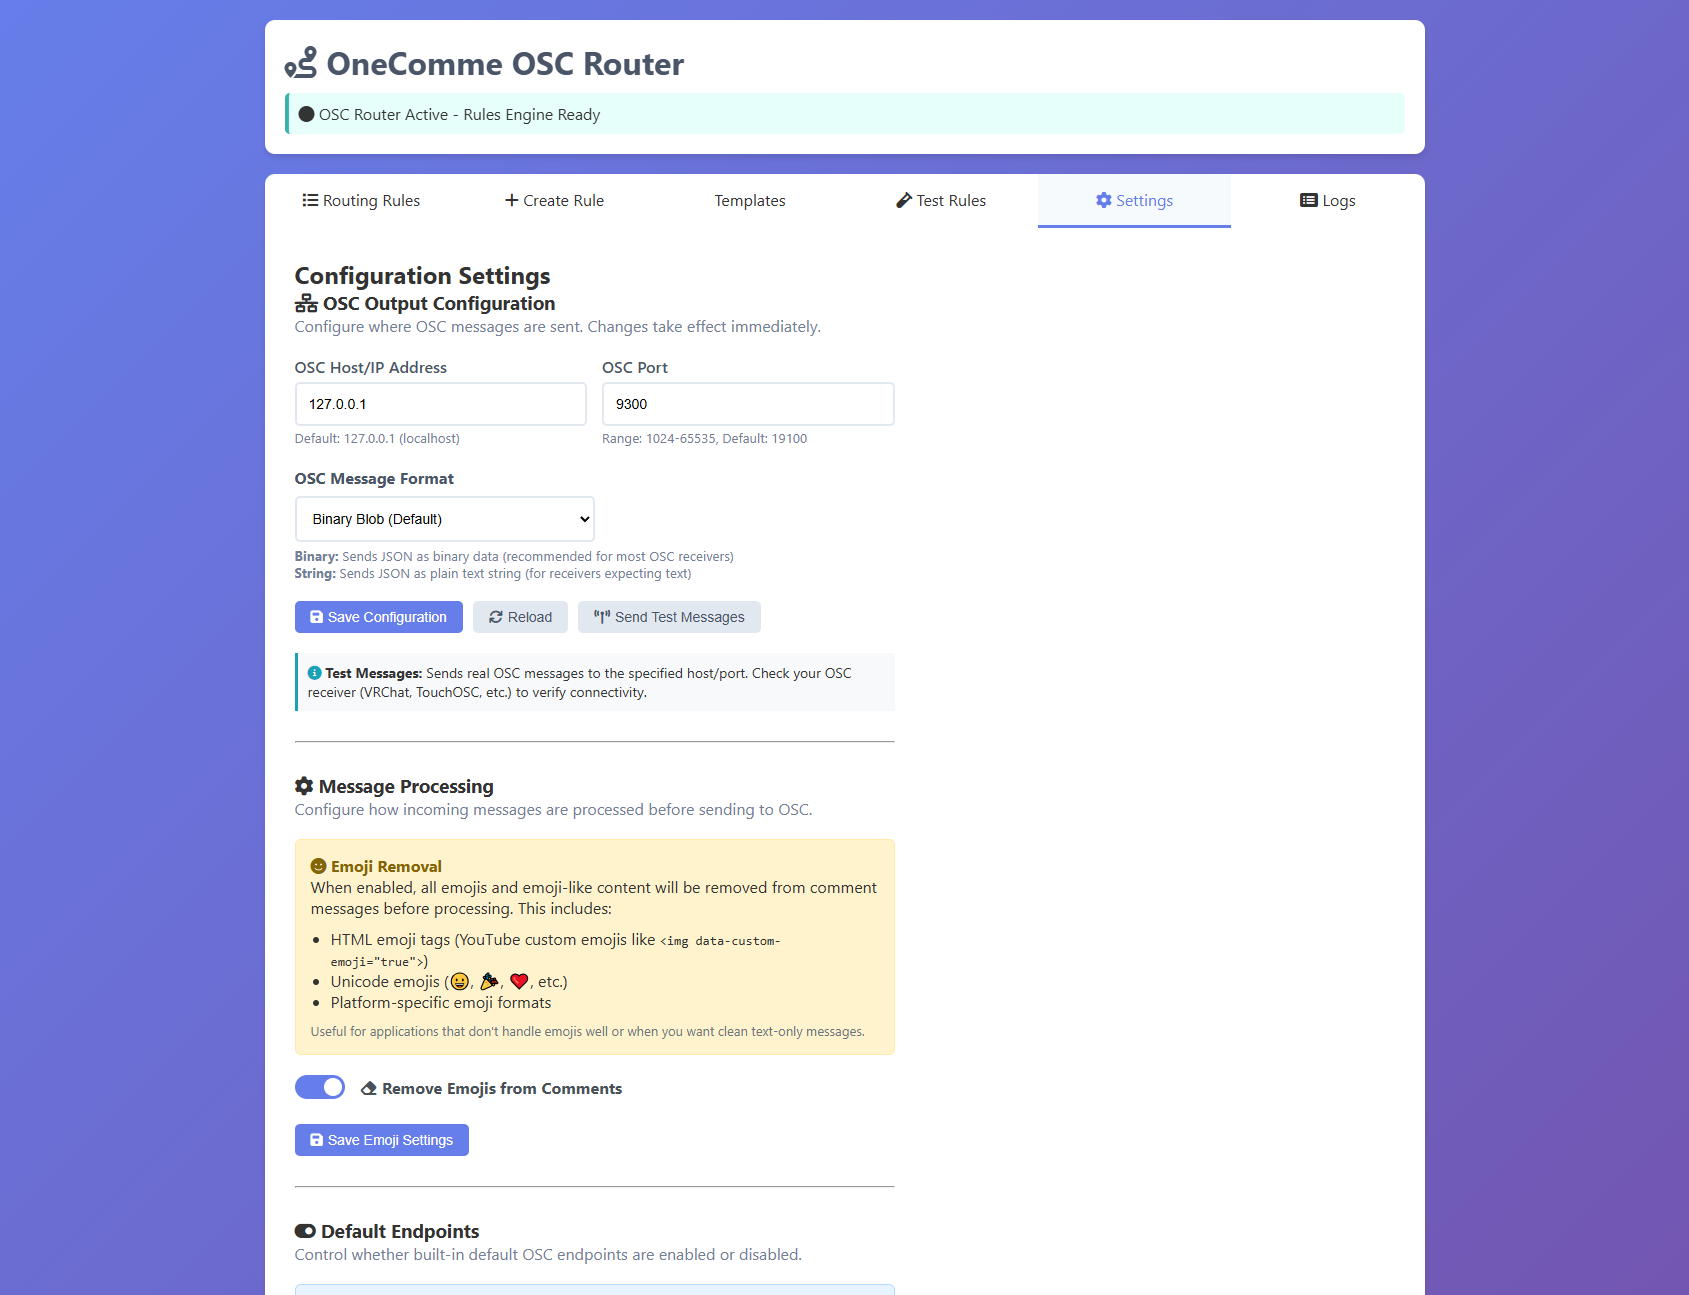
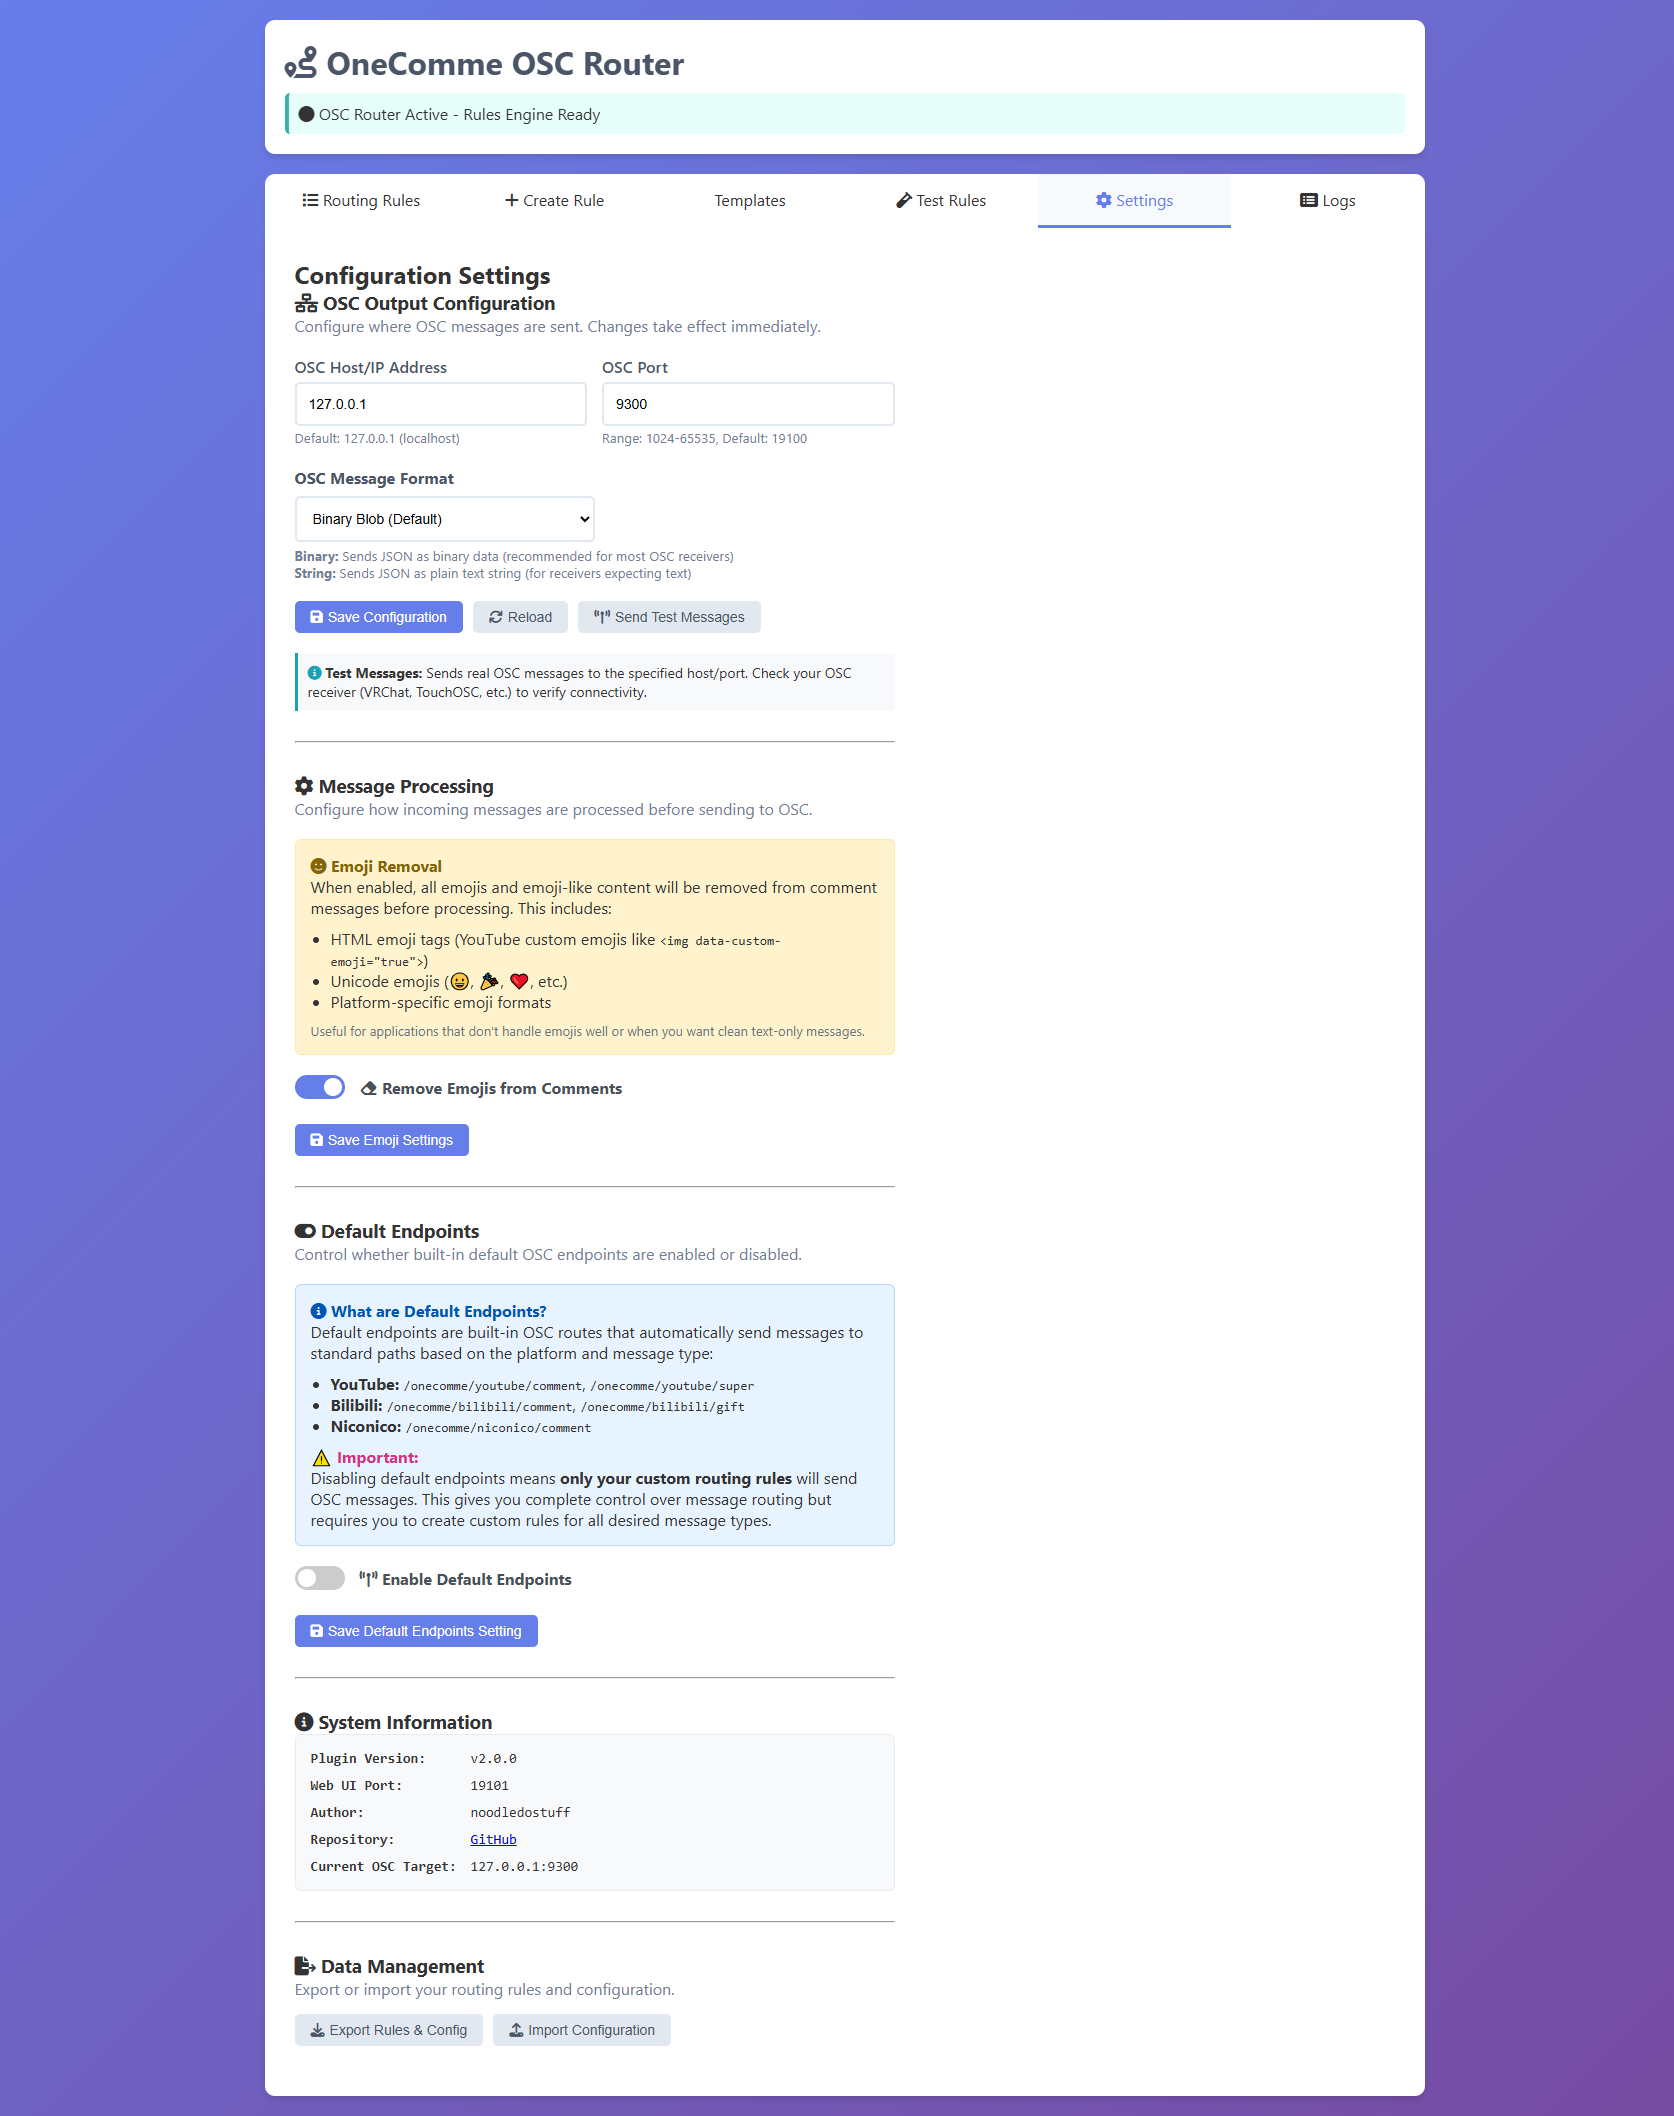
⚙️ Settings Tab
Configure plugin behavior:
- OSC Output: Host, port, message format
- Emoji Removal: Strip emoji from messages
- Default Endpoints: Enable/disable platform-specific endpoints
- Advanced: Connection settings, performance tuning
- Backup/Restore: Export and import configuration
🎨 Creating Custom Routing Rules
Routing rules allow you to send specific types of messages to different OSC endpoints. Let's create a rule step-by-step.
- Click on the Rules tab
- Click the "Add New Rule" button
- The rule builder modal will appear

Fill in the basic information:
- Rule Name: Descriptive name (e.g., "High Value Super Chats")
- Description: What this rule does (optional but recommended)
- Endpoint: OSC address where messages will be sent (e.g.,
/chat/superchats) - Enabled: Check to activate immediately
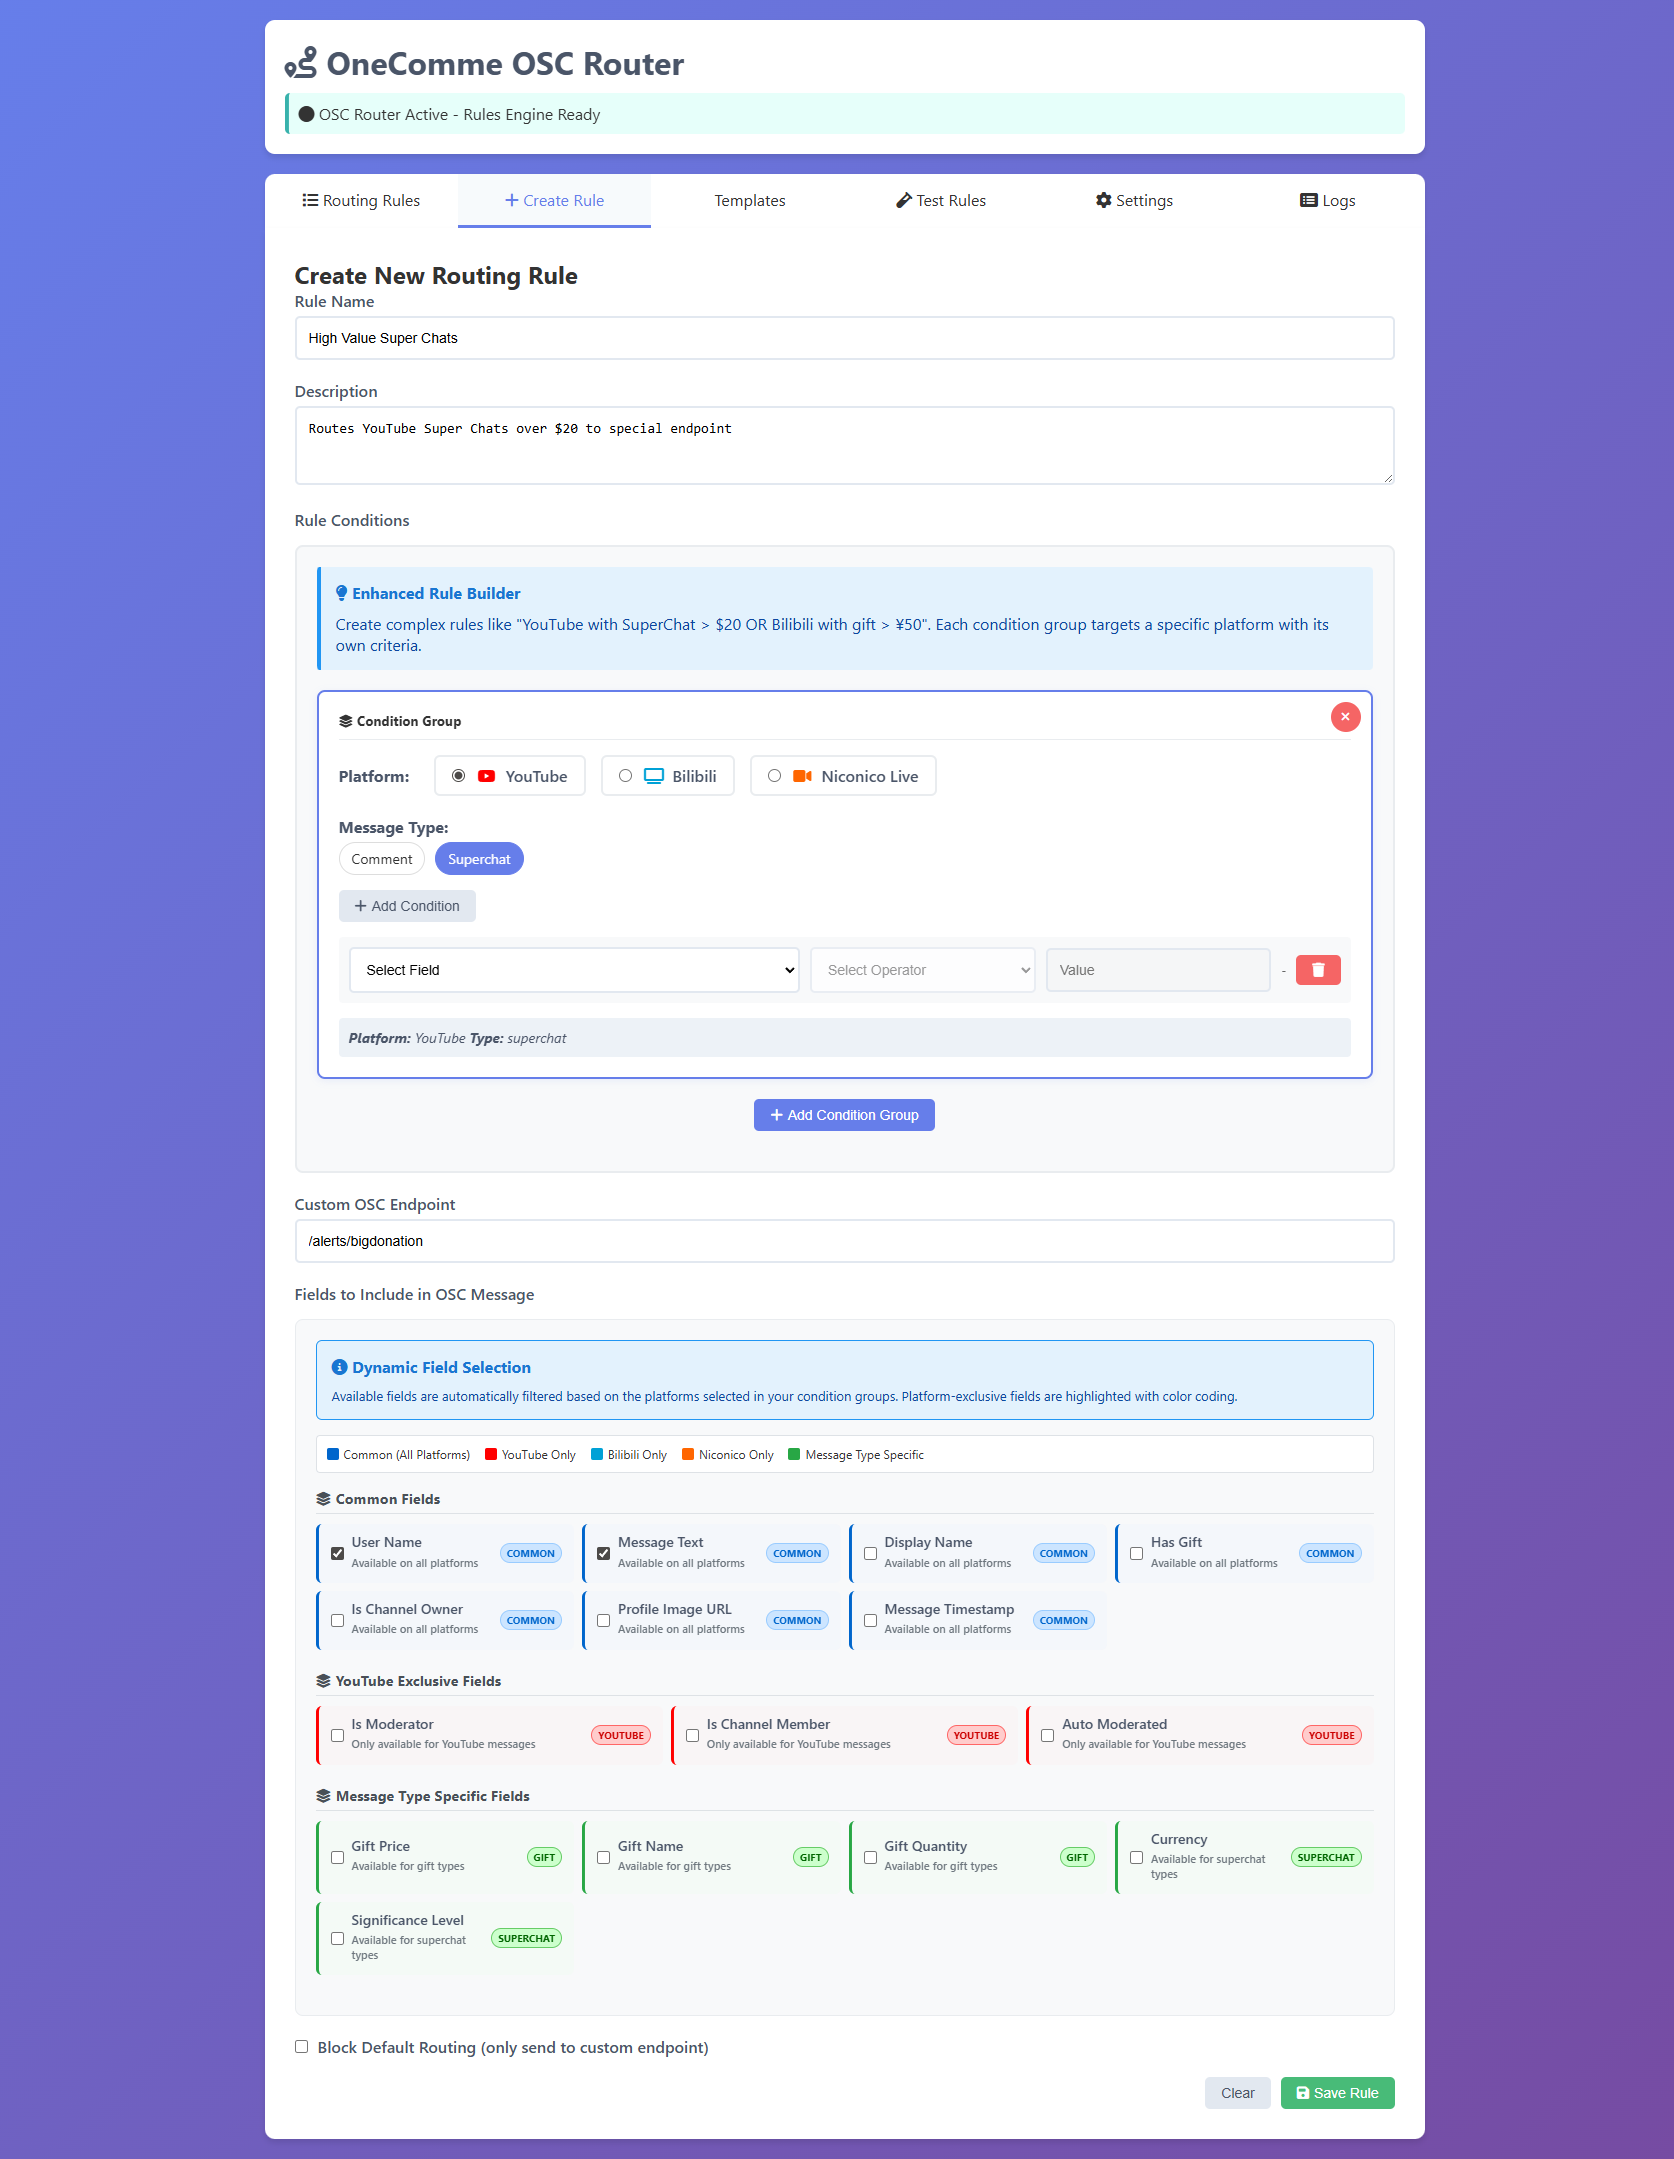
Conditions determine which messages match this rule. Example: Route Super Chats over $20
- Click "Add Condition Group"
- Select Platform: YouTube
- Select Message Type: superchat
- Click "Add Condition"
- Set:
- Field:
amount - Operator:
greater_than - Value:
20
- Field:

equals- Exact matchnot_equals- Not equalcontains- String containsnot_contains- String doesn't containgreater_than/less_than- Numeric comparisonregex- Regular expression matchexists/not_exists- Field presence
Field mappings let you customize which data fields are included in the OSC message. If not specified, all fields are sent.
Example mappings:
username→namemessage_text→commentdonation_amount→amountcurrency_code→currency
Screenshot: Rule builder with field mappings
Add screenshot: rule_builder_mappings.png
Before saving, test your rule with sample data:
- Click the "Test Rule" button
- The test panel will show sample messages
- See which messages would match your rule
- Adjust conditions if needed
Screenshot: Rule test results showing matched messages
Add screenshot: rule_test_results.png
Once you're satisfied with your rule:
- Click "Save Rule"
- The rule appears in your rules list
- Toggle the switch to enable/disable anytime
- Rules are automatically saved to disk
Screenshot: Rules list showing newly created rule
Add screenshot: rule_saved_in_list.png
Example Rules
Here are some useful rule examples to get you started:
| Rule Name | Purpose | Conditions |
|---|---|---|
| VIP Members Only | Route messages from channel members | is_member equals true |
| Bilibili Big Gifts | Highlight valuable Bilibili gifts | coins greater_than 100 |
| Keyword Filter | Catch specific keywords | comment contains "VRChat" |
| Block Spam | Filter out spam messages | comment regex "\\b(spam|bot)\\b" (NOT logic) |
🎮 VRChat Integration
The plugin is optimized for VRChat out of the box. Here's how to get chat messages displaying in-world:
- VRChat installed and running
- Basic understanding of VRChat's OSC system
- An avatar or world that can receive OSC messages
Step 1: Enable VRChat OSC
In VRChat's Action Menu:
- Open Options
- Go to OSC tab
- Enable OSC
- Click Reset Config (if having issues)
Screenshot: VRChat OSC settings menu
Add screenshot: vrchat_osc_settings.png
Step 2: Verify Connection
The plugin sends messages to port 19100 by default (VRChat's standard port). To verify:
- Start a stream with OneComme
- Have someone send a chat message
- Check the plugin's Logs tab for outgoing messages
- Look for
/onecomme/youtube/comment(or similar) in the logs
Screenshot: Logs showing messages being sent to VRChat
Add screenshot: logs_vrchat_messages.png
Step 3: Set Up Avatar/World Parameters
To display messages in VRChat, you'll need avatar parameters or world scripts that listen to OSC addresses.
Default OSC Endpoints:
/onecomme/youtube/comment- YouTube comments/onecomme/youtube/superchat- Super Chats/onecomme/bilibili/comment- Bilibili comments/onecomme/bilibili/gift- Bilibili gifts/onecomme/niconico/comment- Niconico comments
Troubleshooting VRChat Connection
If messages aren't appearing in VRChat:
- Verify VRChat OSC is enabled in settings
- Check firewall isn't blocking UDP port 19100
- Confirm OneComme is receiving chat messages
- Look at plugin logs to verify messages are being sent
- Try the Binary vs String format toggle in Settings
- Restart VRChat after making OSC changes
🔧 Troubleshooting
Plugin Won't Load
Solutions:
- Verify folder is named exactly
onecommeOSCrouter(case-sensitive) - Check that
plugin.jsexists in the root of the plugin folder - Ensure
node_modulesfolder exists (should be included in release) - Try a complete OneComme restart (not just refresh)
- Check OneComme console for error messages
Web Interface Won't Load
http://localhost:19101 shows "can't reach this page"
Solutions:
- Verify plugin is enabled in OneComme settings
- Check if another application is using port 19101
- Try accessing from a different browser
- Look for web server startup messages in OneComme console
- Check Windows Firewall settings for blocked ports
Messages Not Reaching Target Application
Solutions:
- Verify target application is listening on the correct port
- Confirm OSC host/port in Settings matches target app
- Try switching between Binary and String message format
- Check firewall isn't blocking UDP traffic
- Use
npm run monitorto verify OSC messages are being sent - Restart target application after changing OSC settings
Rules Not Triggering
Solutions:
- Verify rule is enabled (toggle switch is on)
- Use the Rule Test feature to validate conditions
- Check condition logic (AND vs OR)
- Verify field names match incoming message structure
- Simplify conditions to test (remove all but one condition)
- Check Logs tab to see which rules are matching
Getting Help
If you're still experiencing issues:
- Check the GitHub Issues page for similar problems
- Review the Q&A section in the README
- Run the test suite:
npm test(from plugin directory) - Open a new issue with:
- OneComme version
- Plugin version
- Operating system
- Console error messages
- Steps to reproduce
🚀 Advanced Usage
Testing OSC Messages
The plugin includes testing utilities in the tests/ directory:
# Run all tests
npm test

# Test configuration persistence
npm run test:config

# Test OSC reliability
npm run test:osc

# Test message formats
npm run test:formats

# Real-time OSC monitor
npm run monitor
Configuration Files
Plugin settings are stored locally:
config.json- Main configuration (created automatically)routing-rules.json- Your custom rulesconfig.backup.json- Auto-backup before changes
routing-rules.json for batch rule creation, then reload in the web interface.
OSC Message Format
Messages are sent as JSON with this structure:
{
  "timestamp": "2024-09-20T08:30:01.123Z",
  "service": "youtube",
  "type": "superchat",
  "user": {
    "id": "UC1234567890",
    "name": "StreamerFan123",
    "display_name": "StreamerFan123"
  },
  "message": {
    "content": "Great stream!",
    "id": "msg_12345"
  },
  "platform_data": {
    "amount": "5.00",
    "currency": "USD",
    "is_member": true
  },
  "processing": {
    "rule_matched": "High Value Donations",
    "endpoint": "/alerts/bigdonation"
  }
}
REST API
The plugin exposes a full REST API at http://localhost:19101/api/*:
| Endpoint | Method | Description |
|---|---|---|
/api/rules |
GET | List all rules |
/api/rules |
POST | Create new rule |
/api/rules/:id |
PUT | Update rule |
/api/rules/:id |
DELETE | Delete rule |
/api/config/full |
GET | Get configuration |
/api/logs |
GET | Get message logs |
/api/status |
GET | System status |
Performance Tips
- Limit active rules to only what you need
- Use specific conditions to reduce processing
- Disable emoji removal if not needed (minor performance gain)
- Keep log retention reasonable (default: 100 messages)
- Monitor memory usage via Overview tab